Install WordPress On Top Of The Bitnami NGINX Stack
Introduction
If you’re interested in creating a personal or small business blog, chances are that you’re going to use WordPress. WordPress is one of the most popular blogging platforms in the world, used on over 60 million websites (according to Wikipedia). And it is not hard to see why: WordPress is very easy to use, comes with thousands of extensions and themes, is completely free, and is open source.
NGINX is an open source web server that helps developers to improve the security, performance and reliability of their applications. And not only that, it can also function as a proxy server for email (IMAP, POP3, and SMTP) and a reverse proxy and load balancer for HTTP, TCP, and UDP servers.
This guide walks you through the process of installing WordPress on top of a running NGINX server.
Nginx HTTP Server - Third Edition: Harness the power of Nginx to make the most of your in…
Assumptions and prerequisites
This guide makes the following assumptions:
- You have a basic understanding of NGINX.
- You have a Bitnami stack installed with an NGINX server - for example, the Bitnami NGINX Stack.
Step 1: Prepare your NGINX server
This step consists of preparing your NGINX server for WordPress. To do so, follow the instructions below:
Approach A: Bitnami installations using system packages
-
Download the latest version of WordPress and extract the files to the /opt/bitnami/wordpress/ directory:
cd /tmp wget https://wordpress.org/latest.tar.gz sudo tar xfvz latest.tar.gz -C /opt/bitnami/ -
Run the following commands to assign the necessary directory permissions:
sudo chown -R bitnami:daemon /opt/bitnami/wordpress sudo chmod -R g+w /opt/bitnami/wordpress -
Create and edit the /opt/bitnami/nginx/conf/server_blocks/wordpress-server-block.conf file and add the configuration block shown below:
server { listen 80 default_server; root /opt/bitnami/wordpress; # Catch-all server block # See: https://nginx.org/en/docs/http/server_names.html#miscellaneous_names server_name _; index index.php; location / { try_files $uri $uri/ /index.php?q=$uri&$args; } if (!-e $request_filename) { rewrite ^/(.+)$ /index.php?q=$1 last; } include "/opt/bitnami/nginx/conf/bitnami/*.conf"; } -
Create and edit the /opt/bitnami/nginx/conf/server_blocks/wordpress-https-server-block.conf file and add the configuration block shown below:
server { # Port to listen on, can also be set in IP:PORT format listen 443 ssl default_server; root /opt/bitnami/wordpress; # Catch-all server block # See: https://nginx.org/en/docs/http/server_names.html#miscellaneous_names server_name _; ssl_certificate bitnami/certs/server.crt; ssl_certificate_key bitnami/certs/server.key; location / { try_files $uri $uri/ /index.php?q=$uri&$args; } if (!-e $request_filename) { rewrite ^/(.+)$ /index.php?q=$1 last; } include "/opt/bitnami/nginx/conf/bitnami/*.conf"; } -
Restart NGINX:
sudo /opt/bitnami/ctlscript.sh restart nginx
Approach B: Self-contained Bitnami installations
-
Create a directory for the WordPress installation:
cd /opt/bitnami/apps sudo mkdir wordpress sudo mkdir wordpress/conf -
Download the latest version of WordPress and extract the files to the /opt/bitnami/wordpress/ directory:
cd /tmp wget https://wordpress.org/latest.tar.gz sudo tar xfvz latest.tar.gz -C /opt/bitnami/apps/wordpress sudo mv /opt/bitnami/apps/wordpress/wordpress /opt/bitnami/apps/wordpress/htdocs/ -
Run the following commands to assign the necessary directory permissions:
sudo chown -R bitnami:daemon /opt/bitnami/apps/wordpress/ sudo chmod -R g+w /opt/bitnami/apps/wordpress/ -
Create and edit the /opt/bitnami/apps/wordpress/conf/nginx-prefix.conf file and add the configuration block shown below:
location / { alias "/opt/bitnami/apps/wordpress/htdocs/"; include "/opt/bitnami/apps/wordpress/conf/nginx-app.conf"; } -
Create and edit the /opt/bitnami/apps/wordpress/conf/nginx-app.conf file and add the content below to it. This is the main configuration file for your application, so modify it further depending on your application’s requirements.
if (!-e $request_filename) { rewrite ^/(.+)$ /index.php?q=$1 last; } index index.php index.html index.htm; location ~ \.php$ { fastcgi_split_path_info ^(.+\.php)(/.+)$; fastcgi_read_timeout 300; fastcgi_pass unix:/opt/bitnami/php/var/run/www.sock; fastcgi_index index.php; fastcgi_param SCRIPT_FILENAME $request_filename; include fastcgi_params; } -
Add the following line to the end of the /opt/bitnami/nginx/conf/bitnami/bitnami-apps-prefix.conf file:
include "/opt/bitnami/apps/wordpress/conf/nginx-prefix.conf"; -
Restart the NGINX server:
sudo /opt/bitnami/ctlscript.sh restart nginx
Step 2: Create and configure the WordPress database
-
Create a database for WordPress.
mysql -u root -p
  create database bitnami_wordpress;

  > NOTE: When you connect to the MySQL database server,
you will be prompted to enter the *root* user password.This is the same as the [application password](/aws/faq/get-started/find-credentials/). -
Create a database user for WordPress.
  create user 'bn_wordpress'@'localhost' identified by 'WORDPRESS-PASSWORD';
  grant all privileges on bitnami_wordpress.* to 'bn_wordpress'@'localhost';
  exit
Keep in mind that you must replace the WORDPRESS-PASSWORD placeholder with a user-defined password.
Step 3: Install WordPress
-
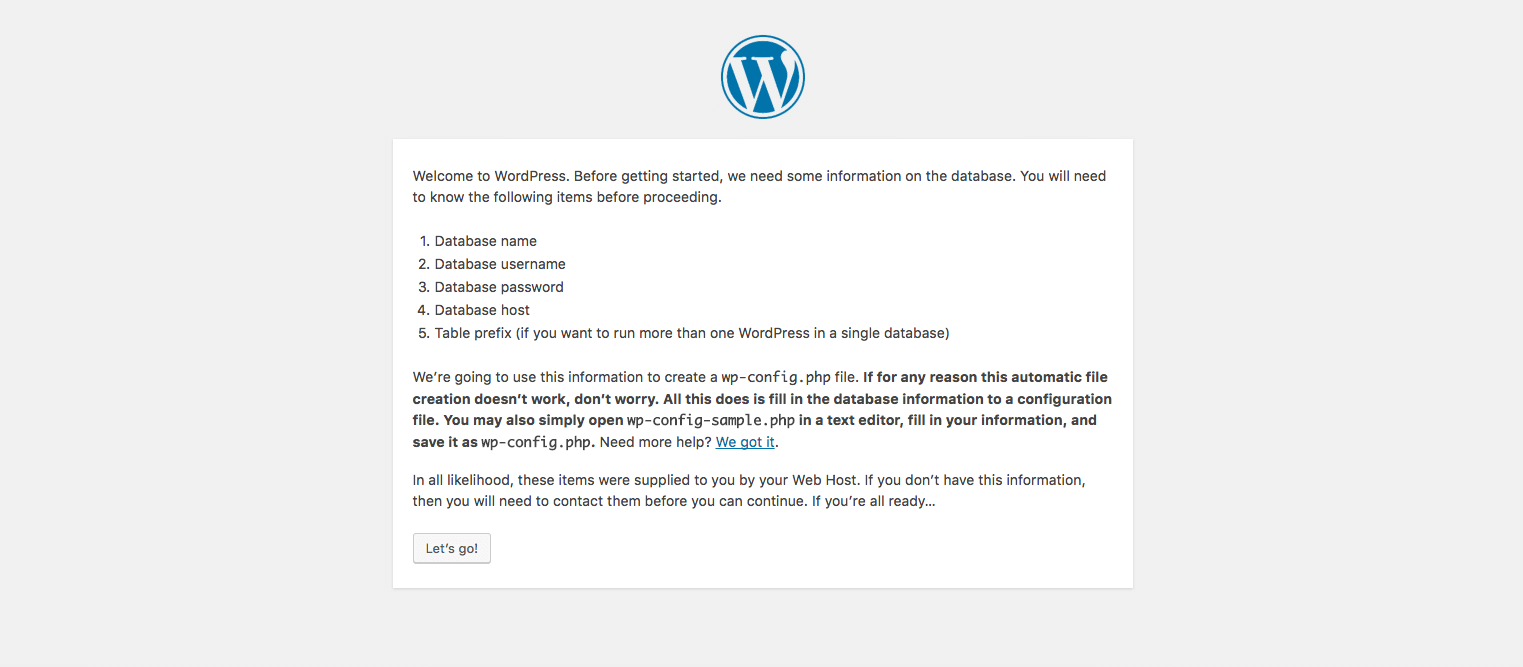
Browse to http://SERVER-IP to launch the WordPress Web configuration wizard. Simply follow the steps as prompted by the wizard. Click the “Let’s go” button to start the wizard.
-
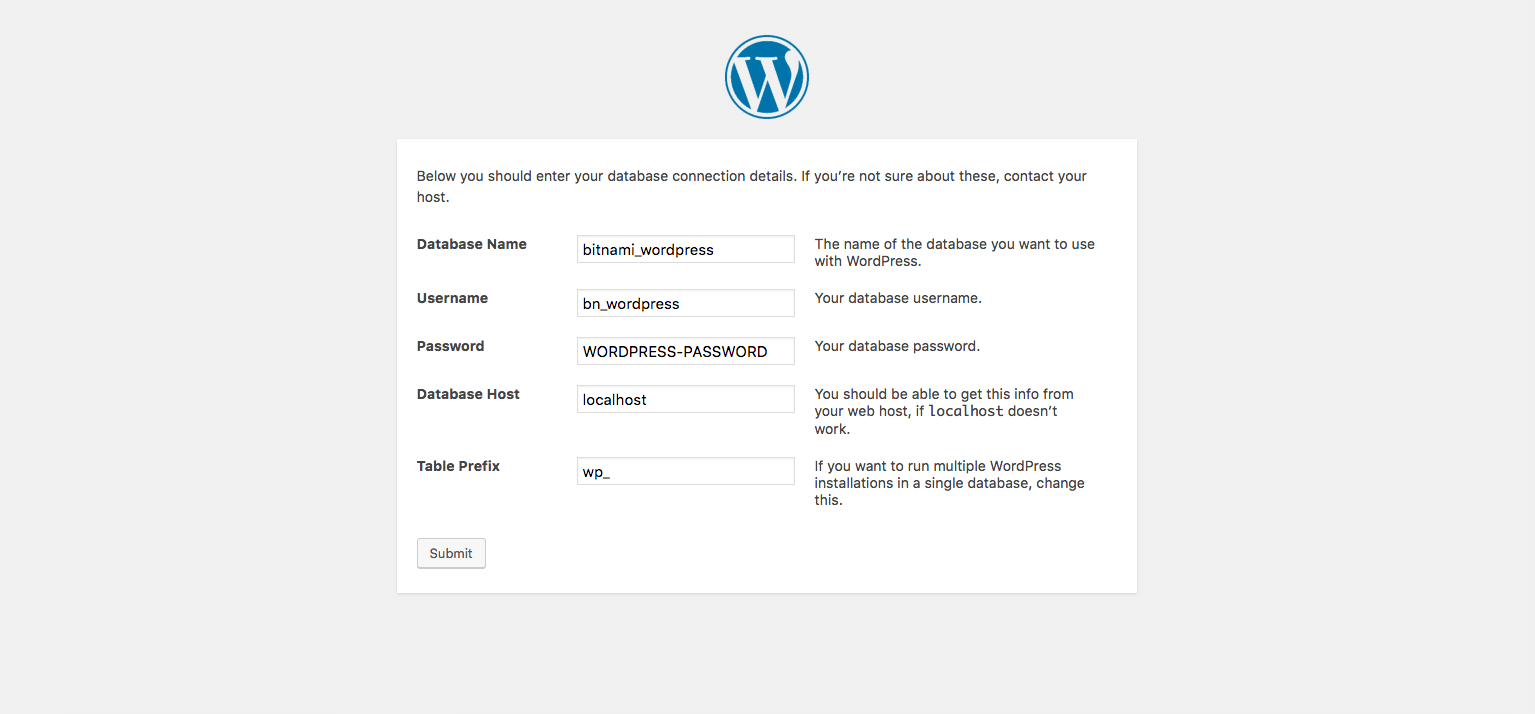
Use the credentials specified earlier when asked for the database configuration and application credentials, as below:
Database Name: bitnami_wordpress User Name: bn_wordpress Password: WORDPRESS-PASSWORD Database Host: localhost Table Prefix: wp_ -
Wait for the database connection to be checked. Click the “Run the installation” button.
-
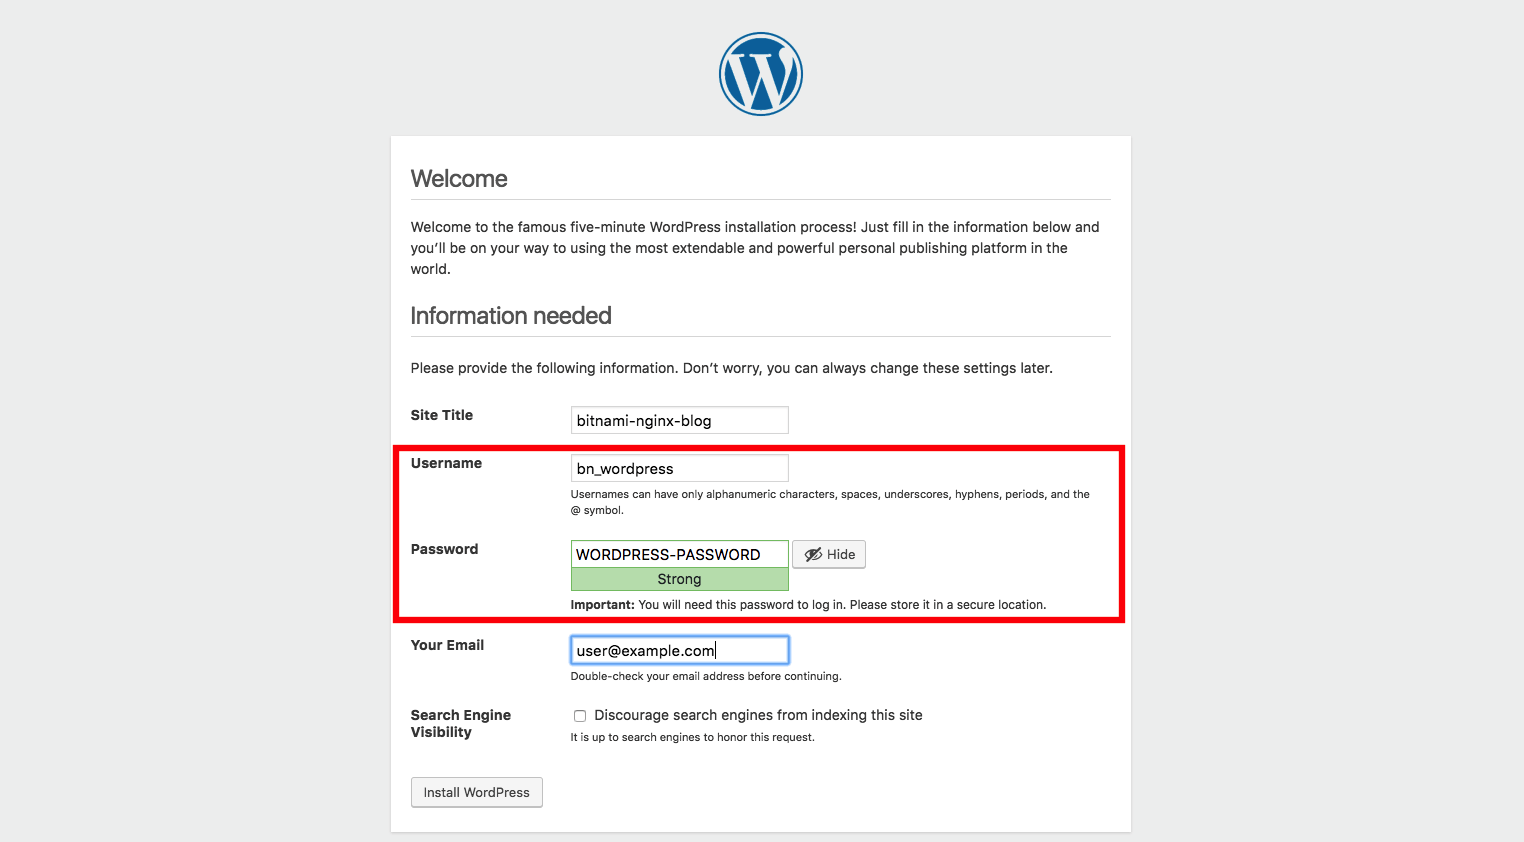
End the WordPress installation process by filling in the information needed for the site title and administrator account. Click the “Install WordPress” button.
IMPORTANT: Use the credentials specified earlier when creating the database user for WordPress. Remember that you must replace the WORDPRESS-PASSWORD placeholder with the same password you defined when creating the database user for WordPress.
Step 4: Configure WordPress plugin authentication and security
The last step is to make some changes to the WordPress configuration file.
Approach A: Bitnami installations using system packages
-
Once the installation process is complete, run the following command to disable FTP authentication for plugin installation:
sudo echo "define ( 'FS_METHOD', 'direct' );" >> /opt/bitnami/wordpress/wp-config.php -
Change the permissions of the wp-config.file file:
sudo chmod 640 /opt/bitnami/wordpress/wp-config.php sudo chown bitnami:daemon /opt/bitnami/wordpress/wp-config.php -
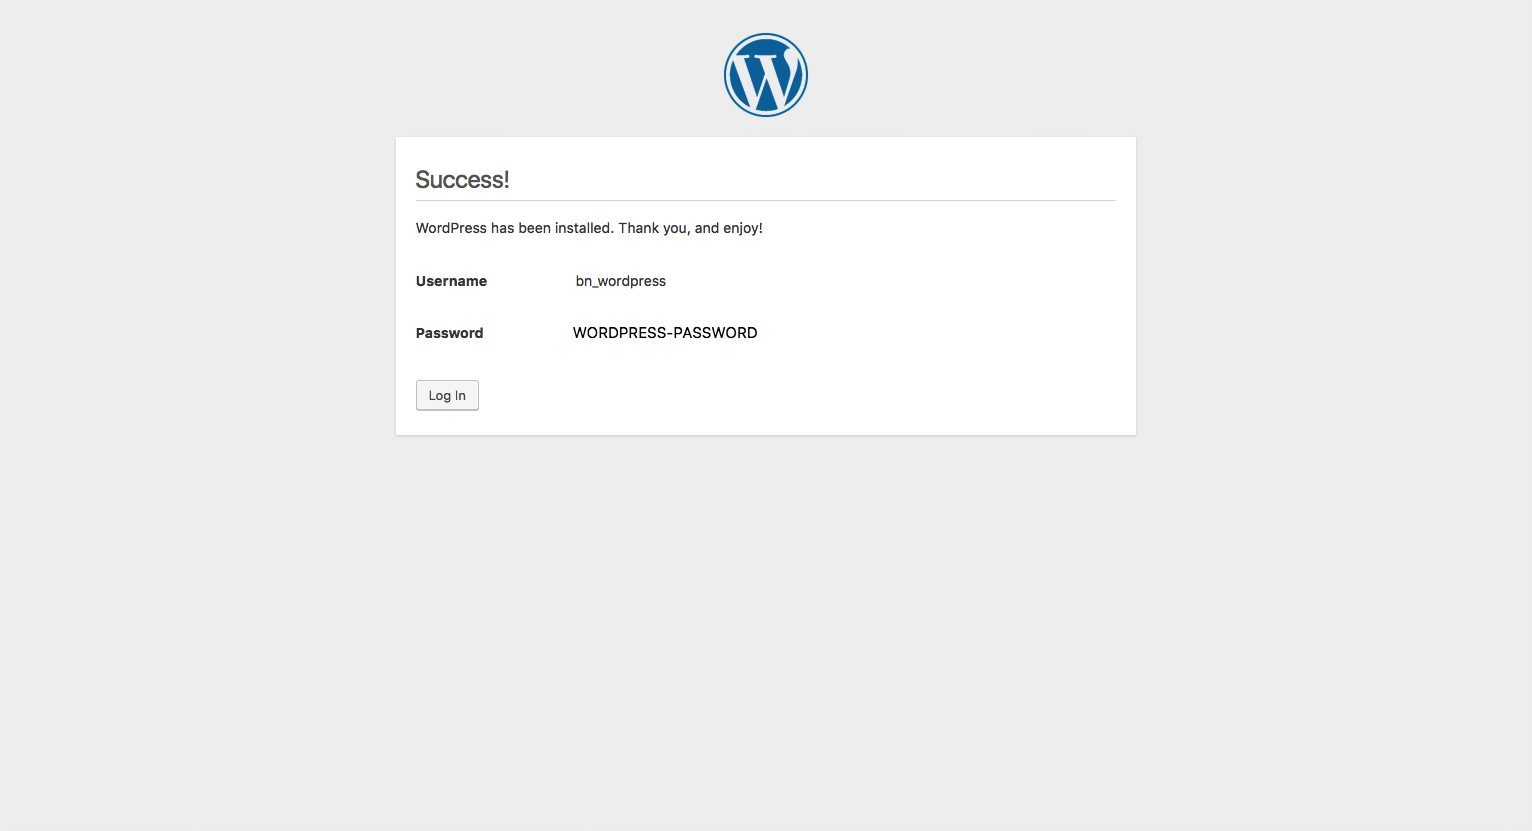
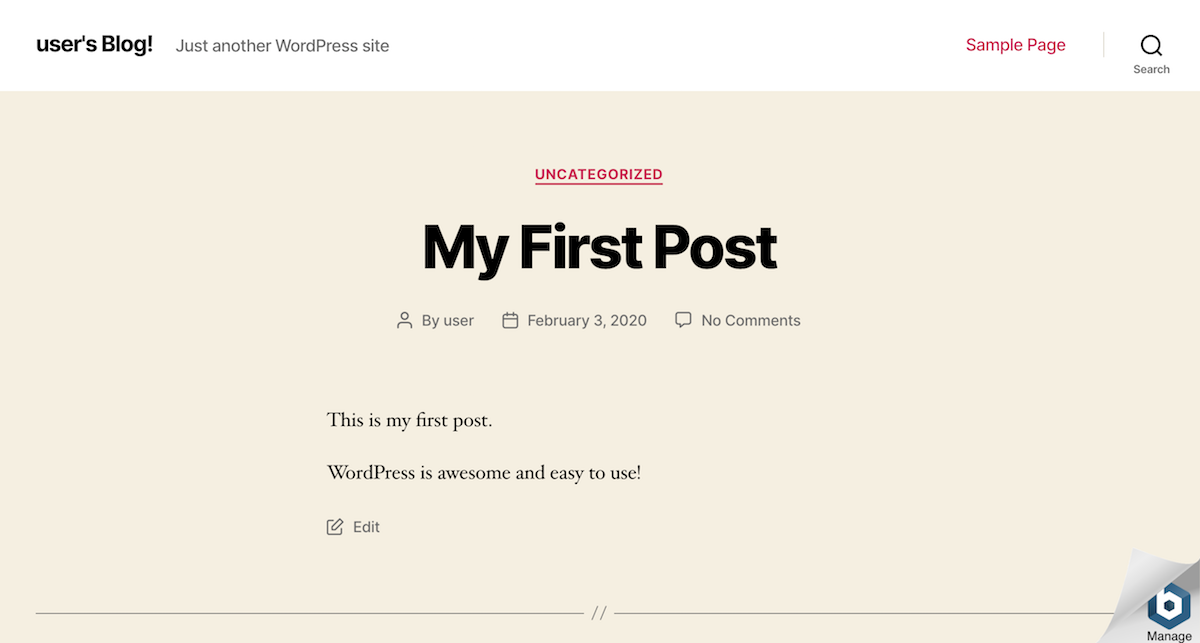
Check the application has been installed by browsing to the IP address of your NGINX Web server. You should see the screen below:
WordPress is now installed. Once installed, you can access the public WordPress site at any time by browsing to the IP address of your NGINX Web server at http://SERVER-IP, and you can access the WordPress administration panel by browsing to http://SERVER-IP/wp-admin.
Approach B: Self-contained Bitnami installations
-
Once the installation process is complete, run the following command to disable FTP authentication for plugin installation:
sudo echo "define ( 'FS_METHOD', 'direct' );" >> /opt/bitnami/apps/wordpress/htdocs/wp-config.php -
Change the permissions of the wp-config.file file:
sudo chmod 640 /opt/bitnami/apps/wordpress/htdocs/wp-config.php sudo chown bitnami:daemon /opt/bitnami/apps/wordpress/htdocs/wp-config.php -
Check the application has been installed by browsing to the IP address of your NGINX Web server. You should see the screen below:
WordPress is now installed. Once installed, you can access the public WordPress website at any time by browsing to the IP address of your NGINX Web server at http://SERVER-IP, and you can access the WordPress administration panel by browsing to http://SERVER-IP/wp-admin.

Computer Technology Blog
ReplyDeleteWelcome to the Citputertech Blog!
Here, we explore the latest advancements and trends in computer technology, providing you with valuable insights and practical tips to enhance your digital experience.
Topics Covered:
Hardware: Reviews, comparisons, and troubleshooting guides for CPUs, GPUs, motherboards, and other hardware components.
Software: Tips and tutorials on operating systems, productivity apps, and software development tools.
Networking: Guides to networking concepts, wireless technologies, and troubleshooting network issues.
Security: Best practices for cybersecurity, malware protection, and data privacy.
Emerging Technologies: Explorations of cutting-edge technologies like artificial intelligence, machine learning, and blockchain.
Our Mission:
Our goal is to empower our readers with the knowledge and skills to navigate the ever-evolving world of computer technology. Whether you're a tech enthusiast, a student, or a professional, we aim to provide you with valuable information and resources.
Contact Us:
Have questions, suggestions, or want to contribute to our blog? Reach out to us at:
Email: citputertech@gmail.com
Social Media: Facebook, Twitter, Instagram
Recent Posts:
How to Choose the Right CPU for Your Needs
The Ultimate Guide to Windows 11
Network Optimization: Tips for a Faster and Smoother Internet
The Best Cybersecurity Practices for 2023
AI and Machine Learning Explained in Simple Terms
Thank you for visiting the Citputertech Blog. We hope you find our content informative and helpful!