AMAZON SES Full Setup Guide – Open The Sending Limits!
What is AMAZON SES?
Since you are here, I think you already know what Amazon SES (Simple Email Service) is.
But just in case, Amazon SES is an SMTP service provided by Amazon web services (AWS) that allows you to send emails programmatically or through your own email marketing application (sender) like Mailwizz, Mautic, Mailster, or even Desktop apps, like Super Email Sender, Send blaster or Turbo mailer.
Amazon SES in Other words
- The sender: (SMTP service) this is the technical part. It allows you to send emails over the internet.
- The Management Application, where you can configure and manage your Email Lists, Marketing Campaigns, monitor and analyze results, manage your sending servers, and so on.
So we connect both together to get an Email Marketing System.

In our case, The SMTP Part will be Amazon SES.
I thing It's Simple!

In this Guide, I will explain how to setup and configure Amazon SES (Simple EMail Service)
Email Marketing Options
When you want to send emails: you need to use a mailing application connected to the SMTP server or service as explained before.
So when it comes to sending email marketing campaigns, you have three options:
- Subscribe to one of the email marketing companies like MailChimp, Aweber, GetResponse. It allows you to manage everything (Send Emails, Campaigns, Lists… )
- Use an SMTP Service, like Mailgun, SendGrid, Amazon SES… this will require you to use an email marketing application that manages your campaigns and Lists and will use the SMTP service to send emails.
- Build an SMTP Server and send unlimited emails, this is out of the scope here, but if you are interested in learning how to build your SMTP server, you can check the following articles:
- How to Setup SMTP Server and Send Unlimited Emails! (Step by Step Guide)
- Free SMTP Server Setup with Postal (Step by Step Guide)
- Power MTA Setup Guide
Why Amazon SES?
Maybe the main reason for selecting Amazon SES as your SMTP Service is the cheap cost.
Do you believe that you can send a 100K email for 10$ Only !?
Yes, it’s cheap.
The other reason, in my opinion, is the High reputation of Amazon IP addresses, which allows you to get a high percentage of inbox deliver bility, for sure, after you follow the following Guide (How To Land Your Emails In Inbox? The Ultimate Guide!).
Amazon SES Requirments
Whenever you want to work with an SMTP service or if you’re going to build your SMTP server, the main requirement is a DOMAIN NAME.
When you send emails, you will be sending from an email address like this one:
mail@chimty.com
So in my case, “chimty.com” is the domain name that I use to send my emails. so simply it’s required to have a domain name to use when you send emails from your SMTP server.
Usually, it’s your website domain name, except if you are working with cold emails, then it’s better to get and use another domain in case it got blacklisted, to keep your main business domain safe.
So if you don’t have a domain yet, go and get one NOW! in order to continue the Setup.
How to get a domain? simply you buy one! and it costs around 10$ per year, so it’s not that big deal!
We have a lot of DOMAIN REGISTRATION PROVIDERS where you can get a domain from like:
- Godaddy.
- Namecheap.
- freenom.
- Enom.
- Google Domain.
Here in the course, I will be using Godaddy to
get my domain, but you can use any other service if you want, all work
in the same way, and if you need any help, I will be here 
You can watch this 3 minutes video to see how to get and buy a domain from Godaddy Domain Registrar if you are a beginner.
Manage your Inventory | Grow your restaurant business | Manage your Employee | Control your accounts
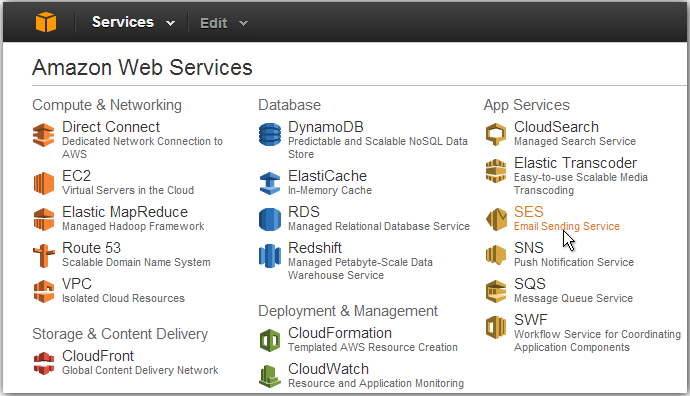
Amazon SES Setup.
After that, go down and read more about how to be accepted on Amazon SES and open the limits.
How to be accepted on Amazon SES and increase the sending limit?
This Question may be the main question that I get from people all over the world concerning Amazon SES.
Everyone asks:
“How
I can open amazon sending limits?”
“How can I remove the Amazon SES
sandbox mode?”
“How to be accepted by Amazon SES ?” ,
“Am Always being
rejected by Amazon, what is the solution, please help!”
These are a sample of hundreds of questions I get every month. And honestly, this is the main reason why I am writing this article.
When it comes to my business, I have my SMTP server besides using Amazon SES and Google GSuite For email Marketing and management.
Mainly, I separate emails in this way:
- Transactional Emails: Google Gsuite
- Marketing Emails: Amazon SES and My Server (I distribute the load)
But I was surprised by the number of people being rejected by Amazon SES ! because I don’t remember that I was rejected any time!
I built more than 20-30 SMTP servers this year, I use Amazon SES for a while, and everything is great.
This issue made me do some more deep researches and see why people are being rejected so I get a solution for you.
What I Found!
Unfortunately, I found that 100% of those who contacted me asking on how to be accepted on Amazon SES, don’t even have a website!
Ok, I didn’t mention that it’s required to have a website! What happened now!
Yes, Technically to apply to amazon SES, you don’t need a website. And it’s not obligatory.
But this means that you are almost 70-80% working illegally in email marketing which means you want to send emails to people who didn’t subscribe to your newsletter or you didn’t collect their emails legally, maybe by scraping Facebook or by some google Search queries.
These methods are considered as spamming for amazon, and for sure you will not be accepted!
for that, having a website that has a registration form or some opt-in forms will help you to prove to amazon or any company, that you are working legally and you collect emails legally, and you are not a spammer.
Of course, I am talking here about honesty, don’t go, and create a temporary sample website and add a form, then apply!
We are in the 21’s century. This dump action is detected instantly with intelligent systems.
So my little advice for you, if you want to start a real business online, you need to have a Website, it can be a WordPress Website or anything that reflects your company and your work.
You can start a blog and collect emails legally using opt-in forms or maybe using Facebook Leads Ad Campaign, or any other legit way for collecting emails.
Then believe me when you apply to amazon with these prerequisites, you will be accepted in less than 24 hours.
By the way, you can join my Free WordPress Super Training Series and learn how to build a WordPress site quickly, check it out here.
Sample Form To Send
Everyone contacted me about increasing sending limits asked me to send the letter that I used so I was accepted.
It’s not a Magic Trick!
Now I think you know that there are no magic tricks here. It’s just proving that you are not a spammer. So there is no standard letter that I send to be accepted, even every time I post a different message that I write when I want to submit the form to increase the limits on SMTP.
But anyway, I will share with you what I say or what you have to say when you apply for the Limit increase.
Amazon SES – Increase Sending Limits Form.
Case classification
Mail Type: Set as Transactional. Setting as Marketing Emails can cause a deep review of your account. So start with transactional.
Website URL: It’s Important to add your website, and ensure that you have some opt in-forms on it.
Describe how you will comply with AWS Service Terms and AUP:
Mention that you will not send to anyone except your subscribers and that you will validate the emails, and that you always read the terms and ensure you comply with it.
Describe how you will only send to recipients who have specifically requested your mail:
Mention that you have some opt in-forms on your site and people can subscribe to your newsletters through the opt in-forms.
Describe the process that you will follow when you receive bounce and complaint notifications
If you are using Mailwizz or other applications that handle bounces and complaints automatically, then mention that it’s enough.
If not, then you need to mention how you are handling bounces.
Requests
Region: Select your Region.
Limit: Daily Sending Quote.
New Limit Value: Don’t set a weird number like 1M or 100K. keep it small like 1000.
Case description
Example Case Description for a blog with weekly updates:
I
have a website that I publish my articles about “pet training” on, and I
want to send my subscribers any newly published articles on a weekly
bases.
I have some opt in-forms that people can use to subscribe to
my newsletters. And I ensure the validity of all emails by using
third-party verification services when anyone tries to subscribe. in
this way, I ensure almost 0% bounce rates.
Manage your Inventory | Grow your restaurant business | Manage your Employee | Control your accounts