Search This Blog

Lets go..


Manage your Inventory | Grow your restaurant business | Manage your Employee | Control your accounts
Showing posts with label Md Mahfuj Jia. Show all posts

Thursday

How to install Git in linux machine and link with NetBeans IDE

[root@db-tom ~]#  yum install git
[root@db-tom ~]#  mkdir -p /home/netizen/git/project
[root@db-tom ~]#  cd /home/netizen/git/project
[root@db-tom ~]#  git config --global user.name "root"
[root@db-tom ~]#  git config --global user.email mahfuj@xxxs.com
[root@db-tom ~]#  git --bare init  [Inside /home/netizen/git/project directory, run this command]

root@ip:/home/netizen/git/project  [Netbeans repo path and password is server password]

Now play with Git & NetBeans

How to establish MySQL remote connection

Bind your ip address ::
[root@db-tom ~]# vim /etc/my.cnf
Add bind-address = 10.12.21.11 (your machine ip address) in my.cnf file

Note : your network must have static private ip (not DHCP) in case of private network or public ip

mysql -uroot -p
password:*******
use mysql;
mysql> GRANT ALL PRIVILEGES ON *.* TO  'USERNAME'@'%'  IDENTIFIED  BY  'PASSWORD';
mysql>FLUSH PRIVILEGES;
mysql>exit

[root@db-tom ~]# /etc/init.d/iptables start
[root@db-tom ~]# chkconfig iptables off

How to install MySQL in CentOS 6

Just run these commands ::
[root@db-tom ~]# yum install wget
[root@db-tom ~]# wget http://dev.mysql.com/get/mysql57-community-release-el6-7.noarch.rpm
[root@db-tom ~]# yum localinstall mysql57-community-release-el6-7.noarch.rpm
[root@db-tom ~]# yum repolist enabled | grep "mysql.*-community.*"
[root@db-tom ~]# yum install mysql-community-server
[root@db-tom ~]# service mysqld start
[root@db-tom ~]# grep 'temporary password' /var/log/mysqld.log
[root@db-tom ~]# mysql_secure_installation

Note : New password must have one capital letter+one special character+one number+one small letter

MySQL start/stop ::
[root@db-tom ~]# /etc/init.d/mysqld stop
[root@db-tom ~]# /etc/init.d/mysqld start
[root@db-tom ~]# /etc/init.d/mysqld restart
[root@db-tom ~]# /etc/init.d/mysqld status

How to install latest Apache Tomcat

Ubuntu ::
Download latest apache tomcat server apache-tomcat.tar.gz file from here:: https://tomcat.apache.org
Give permission to /opt/tomcat :: chmod 777 /opt/tomcat
Move this apache-tomcat.tar.gz to /opt/tomcat directory :: mv apache-tomcat.tar.gz /opt/tomcat
Unpack apache-tomcat.tar.gz :: tar xvzf apache-tomcat-8.0.28.tar.gz
Give proper permission ::
chmod 777 /opt/tomcat/apache-tomcat-8.0.28
chmod 777 /opt/tomcat/apache-tomcat-8.0.28/*
chmod 777 /opt/tomcat/apache-tomcat-8.0.28/conf/*
chmod 777 /opt/tomcat/apache-tomcat-8.0.28/logs/*

vim ~/.bashrc
Add  below two lines end of the file in ~/.bashrc
Press i to edit ~/.bashrc
export JAVA_HOME=/usr/lib/jvm/java-8-oracle
export CATALINA_HOME=/opt/tomcat/apache-tomcat-8.0.28
After adding above two line
Press Esc button then write :wq and press Enter button

Increase tomcat heap memory
Add JAVA_OPTS="-Xms128m -Xmx128m"
in apache-tomcat/bin/catalina.sh at 5th line

Test tomcat server has been installed successfully ::
How to start or stop tomcat server
$CATALINA_HOME/bin/startup.sh
$CATALINA_HOME/bin/shutdown.sh
Open a browser and type localhost:8080 in address bar and you will get a tomcat server page.


CentOS 6.7 ::

Download latest apache tomcat server apache-tomcat.tar.gz file from here https://tomcat.apache.org
Execute these commands ::
[root@db-tom]# mv apache-tomcat-8.0.28.tar.gz  /usr/share
[root@db-tom]# cd /usr/share
[root@db-tom share]# tar -xzf apache-tomcat-8.0.28.tar.gz
This will create the directory /usr/share/apache-tomcat-8.0.28
[root@db-tom share]# cd /etc/init.d
[root@db-tom init.d]# vim tomcat

Press i and copy and paste below script

#!/bin/bash
JAVA_HOME=/usr/java/jdk1.8.0_72
export JAVA_HOME
PATH=$JAVA_HOME/bin:$PATH
export PATH
CATALINA_HOME=/usr/share/apache-tomcat-8.0.28
case $1 in
start)
sh $CATALINA_HOME/bin/startup.sh
;;
stop)   
sh $CATALINA_HOME/bin/shutdown.sh
;;
restart)
sh $CATALINA_HOME/bin/shutdown.sh
sh $CATALINA_HOME/bin/startup.sh
;;
esac    
exit 0

Press Esc and type :wq and again press Enter button
[root@db-tom init.d]# chmod 755 tomcat


Increase tomcat heap memory ::
Add JAVA_OPTS="-Xms128m -Xmx128m"
in apache-tomcat/bin/catalina.sh
at 5th line

Tomcat Service manipulation ::
[root@db-tom]# service tomcat start
[root@db-tom]# service tomcat stop
[root@db-tom]# service tomcat restart

Open a browser and type localhost:8080 in address bar and you will get a tomcat server page

How to install JDK latest version in your machine and install java environment properly

Ubuntu ::
Just run these commands ::
$ sudo add-apt-repository ppa:webupd8team/java
$ sudo apt-get update
$ sudo apt-get install oracle-java8-installer
$ sudo apt-get install oracle-java8-set-default
Test JDK has been installed successfully :: javac

CentOS 6 ::
Downoad latest JDK from here:: http://bc.vc/byid4w
Download JDK .tar.gz file according to your OS bit 32 or 64

Just run these commands ::
[root@db-tom ~]# mkdir /usr/java
[root@db-tom ~]# mv jdk-8u73-linux-x64.tar.gz   /usr/java
[root@db-tom ~]# cd /usr/java
[root@db-tom ~]# tar -xzf jdk-8u73-linux-x64.tar.gz
[root@db-tom ~]# vim ~/.bash_profile
Add  below two lines in ~/.bash_profile
Press i to edit ~/.bash_profile
JAVA_HOME=/usr/java/jdk1.8.0_73
export JAVA_HOME
PATH=$JAVA_HOME/bin:$PATH
export PATH
After adding above lines
Press Esc button then write :wq and press Enter button

Test java has been successfully installed ::
[root@db-tom ~]# echo $JAVA_HOME
[root@db-tom ~]# /usr/java/jdk1.8.0_73


Generate soap client from wsdl in Netbeans


By: Md Mahfuj Jia

Introduction: In previous tutorial we have seen, how to create soap web service using SpringWS and Apache CXF. After creating web service we need to consume and make a client for these web services. Your business layer is completely separate from client and main purpose of the client is creating request and get response.  For java, Netbeans is a fantastic tool for creating client from wsdl and in this tutorial we will see how to create client from wsdl and how to consume it.

Projects snapshots:

Image: 1 –This is our wsdl from previous tutorial and we will generate client from this wsdl.

Image: 2-3  -Steps of generating wsdl client.

Image: 4 –Output after generating client.

Image: 5 –Now we see the generated file in Netbeans.

Image: 6-8 –When client will generate, we see the generated source code contains xmlgorgioncalender date format and we need to convert this date format to java.util.date. For conversion, we need external binding file, which makes our client code serializable and convert the desire date format.

Image: 9 –To avoid this error, just clean and build the project in Netbeans.

Image: 10 –This is our main class. Here we will see how to consume service using wsdl client.


Project Source Code:

Happy coding…

Java class to xsd file generation


By: Md Mahfuj Jia

Introduction: Today I will show u how to generate xsd (XML Schema Definition) from pure java class. As we know the data contact first approach is the industry oriented best practice in writing soap based web service so we need to determine data transformation object (dto) in xsd. xsd writing manually is a time consuming for a big enterprise application. We can easily save time by generating entity class to xsd file. xsd to java class (dto) generation will be done by your IDE (Netbeans, Eclipse, xjc compiler) but java class to xsd generation support is rare.

Project snapshots:

Image: 1 –log4j.properties file describes where your xsd file will be saved and set other necessary properties.
Image: 2 –In line number 38, you just give your java class to generate xsd.


Download source from here:

Happy coding…..

Wednesday

Spring Web Service Complete Tutorial Using Netbeans

By: Md Mahfuj Jia
Introduction:
This tutorial is the 2nd part of service-oriented architecture. In first tutorial (Apache CXF-Spring Integration), we have seen the basic architecture of web-service development, difference between various popular industry-oriented SOA frameworks. In this tutorial I am implementing web service using spring web-service module.

Honestly speaking, spring web-service module is harder than any jax-ws based framework. It requires the knowledge of soap, xml, xml framework, marshaller-unmarshaller etc. But once you get used to programming spring web-services, it will be very easy as coding a jax-ws based framework.

Spring web-service only supports contact first approach, which is the industry oriented best practice and supports automatic wsdl generation. You can easily implement a tight security using spring web-service module.

Prerequisites for this tutorial:
1.Clear concept of object oriented programming and service-oriented architecture.
2.Basic knowledge about spring framework and dependency injection (IoC container).
3.Basic object relational mapping (ORM) knowledge is required.
4.Basic knowledge on soap based web service.
5.Basic knowledge on java xml framework.

Technologies Used:
1.Spring web service module
2.Hibernate
3.MySQL
4.Netbeans
5.Apache Tomcat – 8+
7.JEE 7
8.JDK 7+


Image: 1 – Project Architecture

Image: 2-Image: 7 – Here we see how to generate xsd file to data transformation object (dto). There are two files inside xsd folder. user.xsd is for data contact mapping and another is a external binding xml file which gives you java.util.date instead of xmlgorgeoan date format. If you want to edit xsd file and regenerate dto, you just delete the jaxBnUser folder inside the JAXB Bindings folder in Netbeans. You will see Generated Sources (jaxb) in Netbeans is also deleted. Now you do step: 2-7 again.

Image: 8-Image: 11 – Basic spring web service module and data source configuration. If you have more than one xsd file, you just add in image: 10 (inside list value) and must add like 49-53 number line for automatic wsdl generation from your new xsd file.

Image: 12-Image: 13 –Service layer implementation.

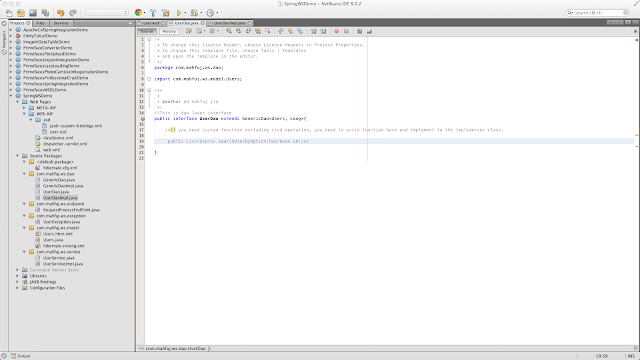
Image: 14-Image: 17 –Dao layer implementation.

Image: 18 –Endpoint service implementation.

Image: 19-Image: 21 –Test web service using SOAP-UI.


Database Table Description:

CREATE TABLE `users` (

  `user_id` bigint(20) unsigned NOT NULL AUTO_INCREMENT,

  `user_name` varchar(45) NOT NULL,

  `display_name` varchar(45) NOT NULL,

  `email` varchar(45) NOT NULL,

  `bank_uid` varchar(45) NOT NULL,

  `status` varchar(45) NOT NULL,

  `created_by` varchar(45) DEFAULT NULL,

  `create_date` datetime DEFAULT NULL,

  `creator_ip` varchar(45) DEFAULT NULL,

  `updated_by` varchar(45) DEFAULT NULL,

  `update_date` datetime DEFAULT NULL,

  `updator_ip` varchar(45) DEFAULT NULL,

  PRIMARY KEY (`user_id`)

) ENGINE=InnoDB AUTO_INCREMENT=2 DEFAULT CHARSET=utf8; 


Project Architecture:

Image:1
Image:2
Image:3

Image:4

Image:5

Image:6

Image:7

Image:8

Image:9

Image:10


Image:11
Image:12
Image:13
Image:14
Image:15
Image:16

Image:17
Image:18
Image:19

Image:20

Image:21